

How To Repair A Soft Floor In A Mobile Home
If yous've been in many mobile homes, you've probably felt areas of the floor that feel spongy, or soft. You might take even seen holes through the subfloor. Nosotros've seen plenty. Let's talk over the best ways to fix these before you install whatsoever new flooring higher up the subfloor.
I've walked many mobile homes as potential flips or investments. Usually, every home more than 10 years erstwhile has developed a soft spot or ii in the flooring. If these are not repaired properly, they will often visually show up in the floor. Even worse is the feeling of sponginess as yous walk across them.
The Curt Respond
The process of repairing a bad mobile dwelling subfloor is not difficult, simply it should be done with care to achieve the desired upshot:
- Make up one's mind the area to be repaired
- Remove the damaged portion of the subfloor
- Attach flooring joist supports for subfloor replacement
- Replace subfloor with new cloth
- Level new subfloor area
- Replace flooring over the repaired subfloor
Permit'due south look at each of these areas in a bit more particular to get a good understanding of how to practise information technology right the first time.
Determine The Expanse To Be Repaired
The subfloors of many older manufactured homes tend to be made of dense particle board. Over the years, this blazon of subfloor has the tendency to break down in heavy traffic areas within the home.
Holes, of form, are obvious. What is less obvious is the breakdown of the subfloor that hasn't all the same caved through. When the subfloor is getting weak, it feels very spongy or soft when yous walk on it. If you feel a sponginess, or a soft spot, take tiny babe steps all around the area to get a feeling for how unlevel and spongy the expanse is.
When repairing the flooring, y'all will want to remove the entire expanse that feels spongy, soft or unlevel.
I have i mobile habitation that I purchased every bit a rental about 2 years ago. It was in rough condition, simply had renters in identify when purchased. When the renter left, I decided to remodel the home and sell it. There were a few holes and a number of soft spots throughout the entire mobile habitation. The rest of the home had several soft spots throughout.
This abode was a 1980 model and had a subfloor fabricated of particle lath. Rather than repairing small spots all over the business firm, I decided to lay down a new plywood subfloor throughout the dwelling house.
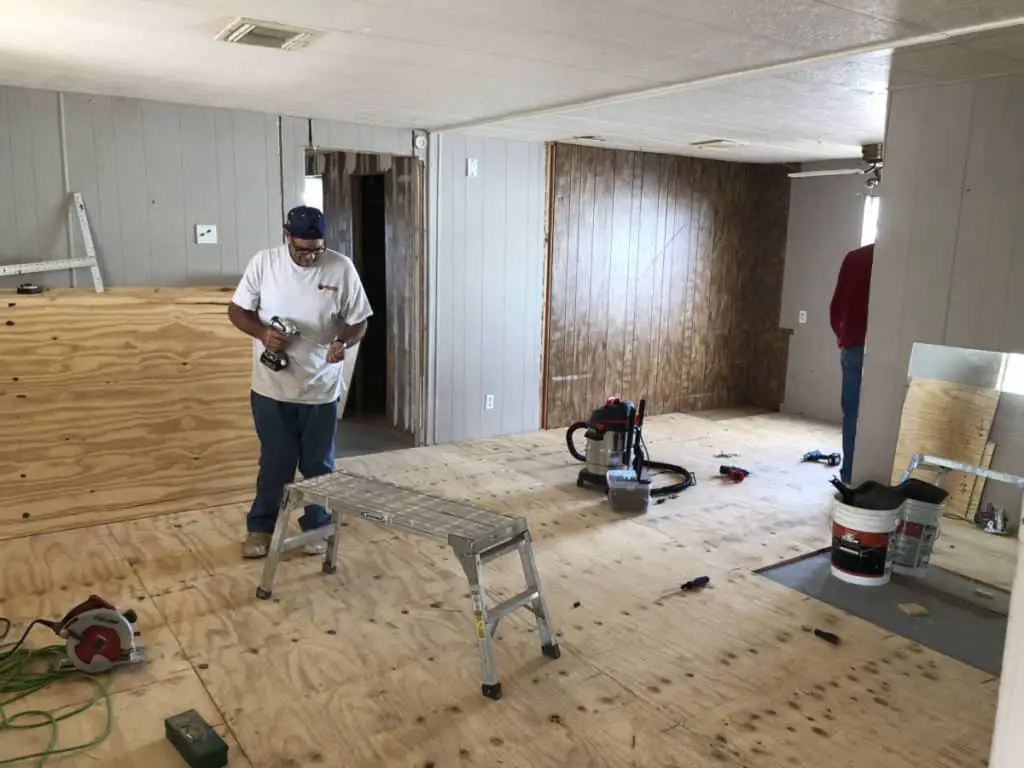
I knew that overall, the finished product would be far more level and feel more solid. The price to exercise this throughout the 1,200 sf dwelling house was well-nigh $1,000 for materials and labor. When nosotros finished, the floor felt very solid throughout.
Replacing the entire floor is not commonly necessary. In another contempo home that we did, there had been a leak in the laundry room and the subfloor was damaged in that room, as well as into the hallway and bathroom.
We removed all of the damaged subfloor cloth in these areas.
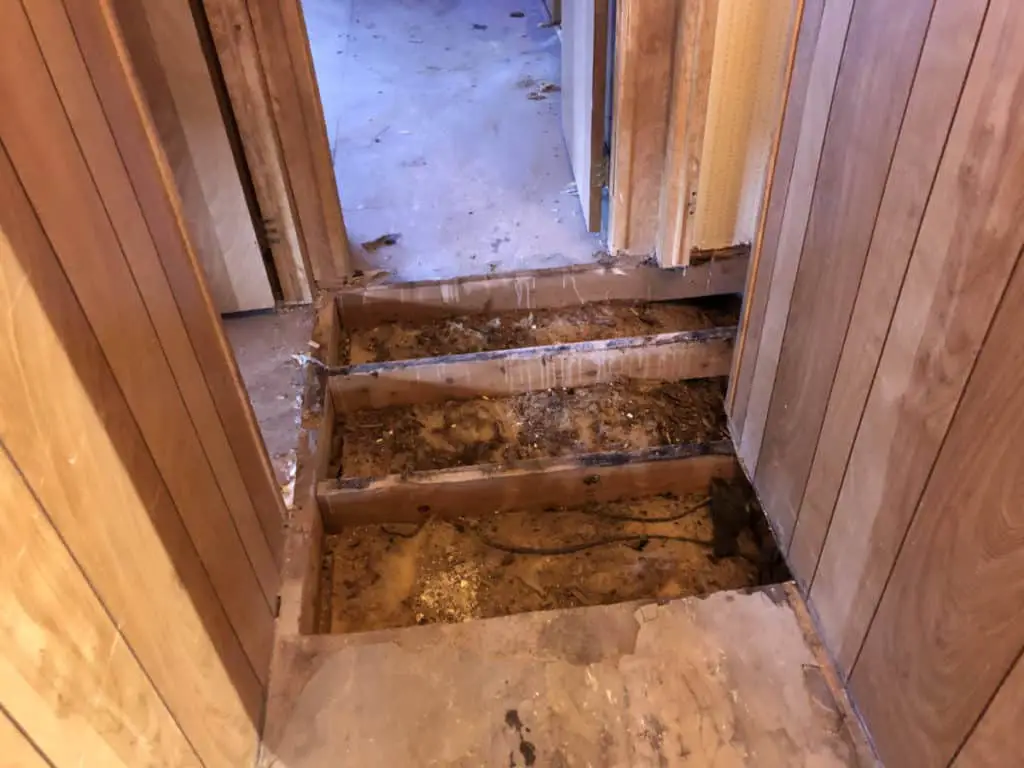
Information technology is ever better to err on the side of replacing more floor than necessary.
Remove The Damaged Portion Of The Subfloor
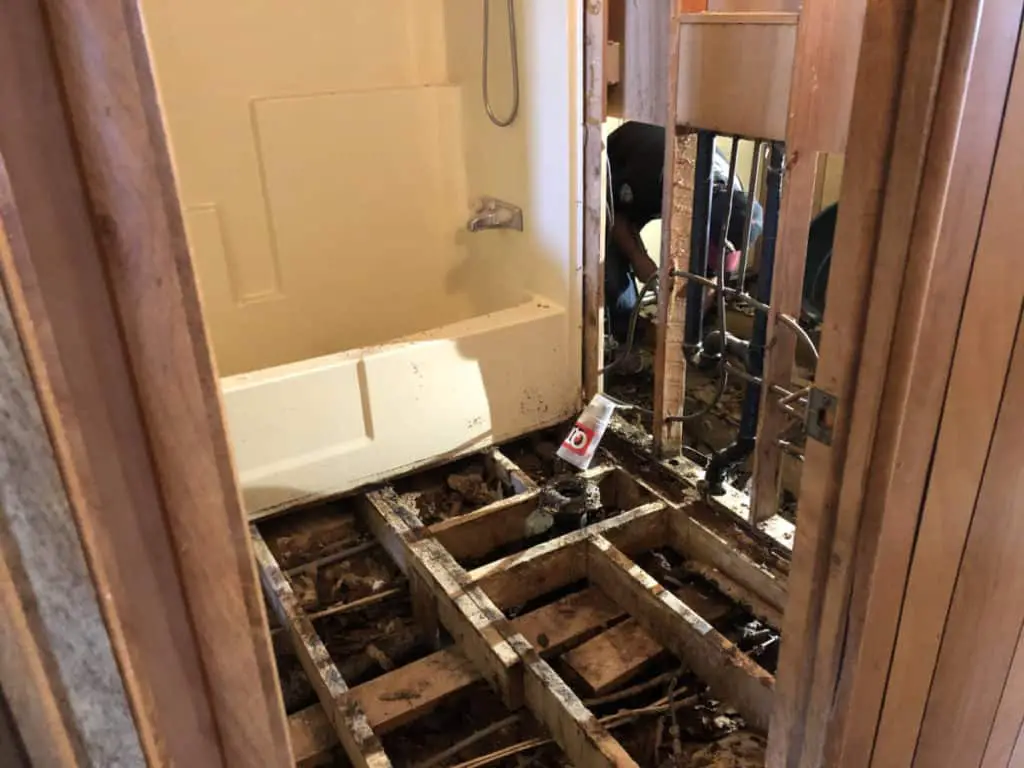
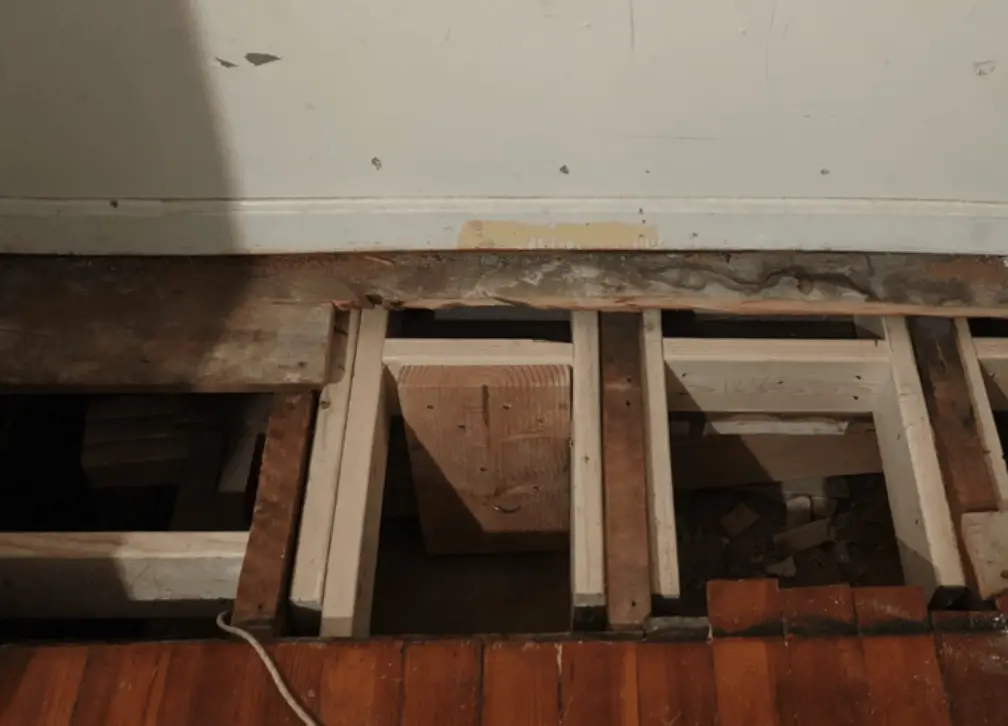
As you can see in the higher up photos, there are flooring joists beneath the flooring. When removing the subfloor, you want to make sure that you don't damage these joists.
The easiest mode to begin removing the subfloor, is to use a big hole saw or a jigsaw and cut out from the hole in the floor or a piece of the soft spot in the floor. Once you locate where the joist(s) are, so you can employ the saw to cut along the side of the joist.
If you are removing a larger area that covers several joists, the you will desire to starting time cut out the bad areas betwixt each joist, and so remove the minor piece left on summit of the joist(s).
When removing subfloor, remove any part that feels compromised. It doesn't affair if at the end, the cut out portion isn't a perfect foursquare or rectangle. Nosotros'll wait in the next section how to set the joists for supports to support the new subfloor regardless of the shape.
Adhere Flooring Joist Supports For Subfloor Replacement
Earlier replacing the subfloor material, the joist support area underneath volition need to be modified. It is necessary that all edges of the new subfloor are supported underneath and can exist fastened with screws.
In order to exercise this, building a box of sister supports inside of the flooring joists volition exist needed. The supports will also need to go underneath the remaining edges of the existing subfloor so that those edges tin can as well exist screwed into the new supports.
Cross supports are needed between the flooring joists to support subfloor that has been cutting. There are basically 2 ways to exercise this:
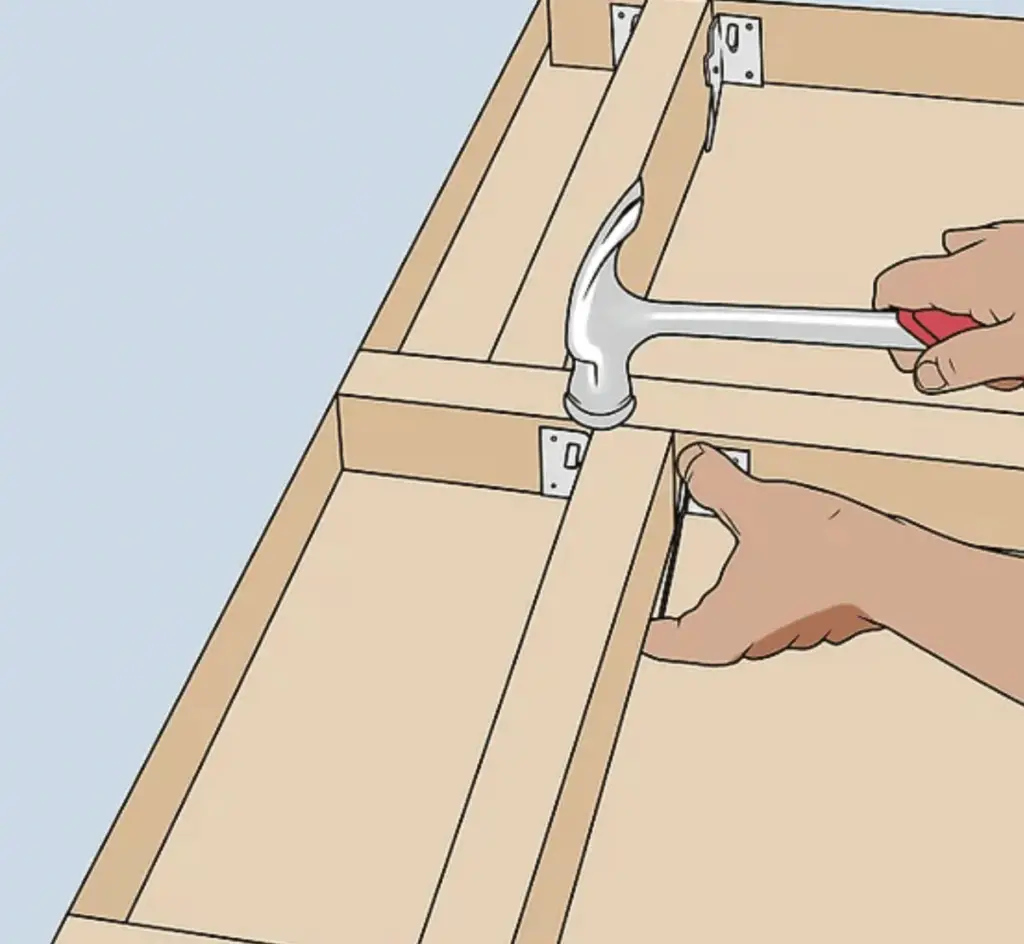
JOIST HANGERS
Two pictures above show building the cross joist support using traditional joist hangers. First, the hanger is secured to the the floor joists. These are screwed into the existing floor joists. And then the cross back up is cut to length, dropped into the joist hangers, and finally attached to the hangers using screws.
Where the installation of this blazon of support tin be difficult, is that the cross support must be located and then that i/2 of the edge is under the old subfloor and the other one/2 volition be under the new subfloor to be installed. Getting the cross support to driblet down into the hangers can be tricky because of the existing subfloor that is notwithstanding on the joist. I prefer to utilise the sistering joist method, equally it is easier to install.
Sis Back up BOX
Using this method is more often than not easier to install the cantankerous back up 1/two under the existing subfloor. See the above moving picture.
Create an "H" from 2 ten 4 lumber. The sides of the H will each spiral into the existing flooring joists. The cross of the "H" volition form the new cross back up that will be located one/ii nether the existing subfloor and the other ane/2 will be exposed and so that the new subfloor edge can be installed over the top. When it is done this mode, the edges of both the old subfloor and the new subfloor tin can exist secured properly to the new cross support in the floor.
The "H" will be congenital before installing into the floor. The cross back up of the "H" volition be securely screwed into the sides of the "H" earlier installing the "H" into the flooring.
After building the "H", it is lowered into the floor. The sides of the "H" are then nailed and screwed into the flooring joists. Remember, the cantankerous support of the "H" must be one/2 nether the edge of the existing subfloor then that the edge of the subfloor tin be screwed into the new cross support.
Replace Missing Subfloor Section With New Material
Once any needed supports for the floor joists are in place, information technology is time to replace the bodily subfloor. Although the subfloor for many manufactured homes is fabricated from pressed board, we like to use a quality plywood for the replacement textile.
The of import thing about choosing the new material is to make absolutely sure that it is of the same thickness as the original subfloor. This will make the leveling process far easier.
When cutting the plywood for the replacement areas, make sure to take careful measurements and try to get the fit every bit tight equally possible.
- Stride 1 – Screw existing subfloor material to new supports.
- Secure all of the original existing subfloor to the new supports with glue and screws. (This volition prevent any squeaks at the seams.)
- Step ii – Advisedly mensurate the size to cutting the new subfloor plywood.
- Pace 3 – Lay new plywood subfloor into identify.
- Step four – Secure new subfloor into place with screws along each edge and joist.
Level New Subfloor Area
The "level sensors" in your feet volition pick up very easily on any uneven areas in your new floor. If the new subfloor is not leveled earlier installing your new flooring material higher up it, you lot'll be able to experience humps and dips with your feet afterward the floor is installed.
To take care of this problem, we have establish that "Henry 555 Level Pro" works perfectly for our purposes:
"The Henry Level Pro 40 lb. Self-Leveling Underlayment is an like shooting fish in a barrel-to-apply, cement-based underlayment that self-levels. Just mix it with water, pour and spread. The underlayment is splendid for smoothing and flattening interior surfaces before installing floor coverings. Use over concrete, wood, tile, terrazzo and cut back adhesive."
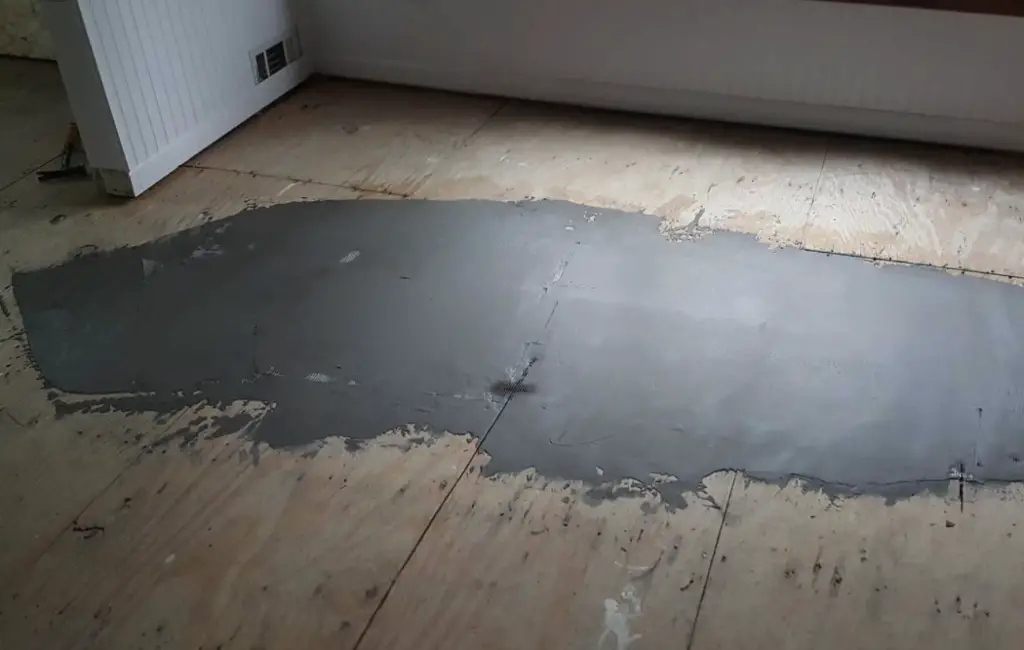
Taking the time for this pace makes the finished production of your new subfloor area experience the way it should underneath your feet.
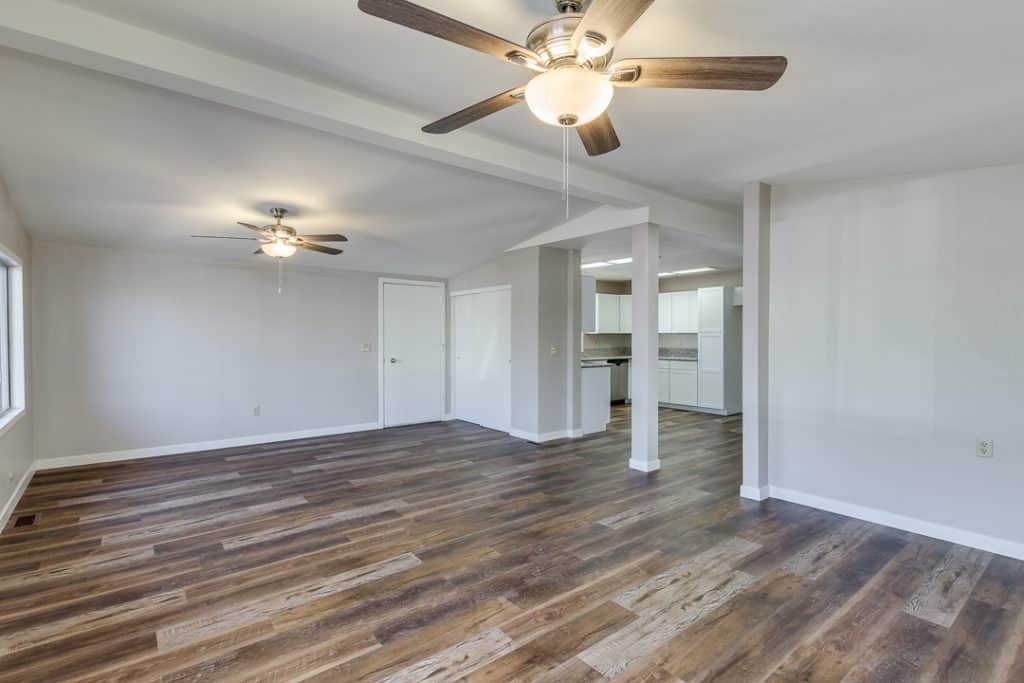
Replace Floor Over The Repaired Subfloor
The concluding stride is to replace the flooring over the repaired area. You lot may have just pulled upward carpet and repaired the floor underneath. If and so, then relaying the carpeting is an easy chore.
Often, when repairing a bad subfloor, information technology is when you are going to install new floor, whether tile, wood, or carpeting.
When a damaged subfloor is properly repaired, your new flooring should feel and look beautiful for many years to come up. Not having any low spots or soft spots in your new flooring makes your dwelling house experience solid and of better structure.
Related Questions
Practice MOBILE HOME ROOF COATINGS REALLY WORK?
No matter where you live, information technology rains! Sometimes a lot, sometimes very little, simply when it does rain, you lot want your mobile dwelling roof to exist watertight. Also, summers tend to be hot, boiling and can generally heat up the roof to be hot enough to cook pancakes.Can popular roof coatings work to keep the water out and the heat off?
Roof coatings arelike a rubberized glue that gets "rolled on" the roof like pigment. It helps seal cracks to go along out water leaks, and it'southward also generally white, which reflects the heat off of the roof. It is one of the greatest and least expensive ways to extend the life of your roof; keeping your home dry and cooler.
HOW CAN I GET RID OF DAMPNESS AND MOLD IN MY MOBILE HOME?
Remember the old saying "an ounce of prevention is worth a pound of cure"? That is absolutely the case when it comes to getting rid of dampness and mold inside of a mobile home.
Water and humidity in whatsoever home, site-built, modular, or manufactured can cause problems for any homeowner. In fact, water remediation (restoration) is a$210 BILLION dollar business in the U.s.a.. In case you lot're wondering, that is A LOT!
When h2o gets trapped in spaces such every bit attics, walls, crawl spaces, carpets, forest subfloors, etc.mold can develop. Mold is a mutual wellness hazard and causes all types of respiratory problems.
Virtually folks think that water damage inside of a home comes either from leaking plumbing or a leaky roof. While those are both true, that is simply the beginning.Sealing out moisture, whether from the roof, windows, doors, floor, skirting or ground is necessary to prevent buildup of dampness and mold.Keeping the wet away to brainstorm with is the ultimate weapon confronting buildup of dampness and mold.

Source: https://mobilehomefriend.com/repairing-damaged-subfloor-in-a-mobile-home/
Posted by: chambersnoutiones.blogspot.com
0 Response to "How To Repair A Soft Floor In A Mobile Home"
Post a Comment